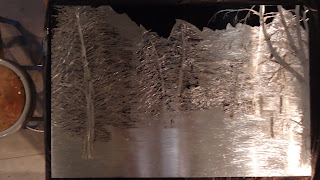
I created this blog in order to have website for my work, but also to bring an interest into printmaking and the techniques used to make these individualistic fine art prints, through traditional means but translated into a contemporary world. This post will cover my technique for how I create my intaglio prints.
This is my 24x36 zinc plate I just had shipped in from Takach Press with a few other tools I needed to work the plate. If you look at my portfolio you will see that I usually work on 4x6 plates, so working on a plate this size will be an exploration in technique.
The first task to accomplish before beginning to etch a plate is to bevel the edges. I use both a file and a triangular scraper to create this edge. The file is aggressive and creates a nice 45 degree bevel quickly, but is not as smooth as I like so I will go over the it with the scraper to take the texture off of the edge.
This is what the beveled edge should look like. This keeps the plate from cutting through your paper or the printing blankets. And now it is time to pull off the protective covering from the plate and get down to business.
Now it is time to hard ground the plate. I use liquid asphaltum thinned with mineral spirits. The asphaltum needs to be cooked onto the zinc with a hot plate heated to around 180 degrees and not exceeding 200 degrees. I also cover the hot plate with newsprint so that my mess is easy to clean up and I don't have to touch the plate to remove it from the heat, and you do not want to start working on the plate until the hard ground has cooled.
I cook the asphaltum until I can no longer see fumes rising from the plate and when I touch the plate I don't leave finger prints. I like the asphaltum to flake off and this is personal preference, nice textures can be created by under-cooking the asphaltum also.
After the Asphaltum has cooled I transfer a basic design to follow for my first etch. There are many techniques for transferring, but for this plate I used charcoal and graphite on a sheet of newsprint about the size of my zinc plate. Place the image face down on the zinc plate, use the regular printing felts and run it through the intaglio press.
Charcoal transfers excellent but rubs off easy, a soft graphite will transfer just as well and smear much less easily.
This technique is nice because it mirror images your design, so it prints how it was designed.
Now it is time to scrape off the hard ground and begin creating the image to print. I use a triangular scraper most of the time in developing my plate switching between the tip and the scraper edge. I also use a diamond dry point tool so that I can create deep cuts against heavy textures.
I like the physicality of working in intaglio, I don't just scrape off the hard ground, but begin building textures on the plate before the etching process.
Now that the hard ground has been removed the way that I want it, I am ready to put the plate in the acid bath.
This is the acid bath set up that I am currently using. The acid bath is 8:1 mixture of water to nitric acid. The ventilation hood keeps the fumes from being too dangerous. The bath is kept covered to prevent too much evaporation. There is a sink near by to rinse the plate.
The reaction of the nitric to the zinc is instantaneous.
Bubbles start forming on the open spots on the plate.
A feather is used to release these bubbles off of the plate and so that they do not texture the plate in that shape and also to create a convection so that the acid reacts more aggressively to the plate.
With a plate this size it does not take long for the acid bath to create its own convection and feathering is not as necessary.
The acid bath starts heating up and the noxious fumes are much more visible, this exemplifies the need for good ventilation throughout the printmaking process.
After the plate has been etched to a satisfactory level it is taken out of the acid bath and rinsed with water. I only etched this plate for around 30 minutes. I usually etch my 4x6 plates 2-4 hours on the 1st etch to create a heavy initial embossment. The 24x36 plate heated up the acid bath much quicker, but there was also a lot more foul bite than I like.
Now the hard ground needs to be removed so that the plate can be readied for the 2nd etch.
Saw dust is used with mineral spirits to weaken the hard ground so that it comes off the plate easier.
The plate can now be proofed and re-hard ground for the 2nd etch.


No comments:
Post a Comment